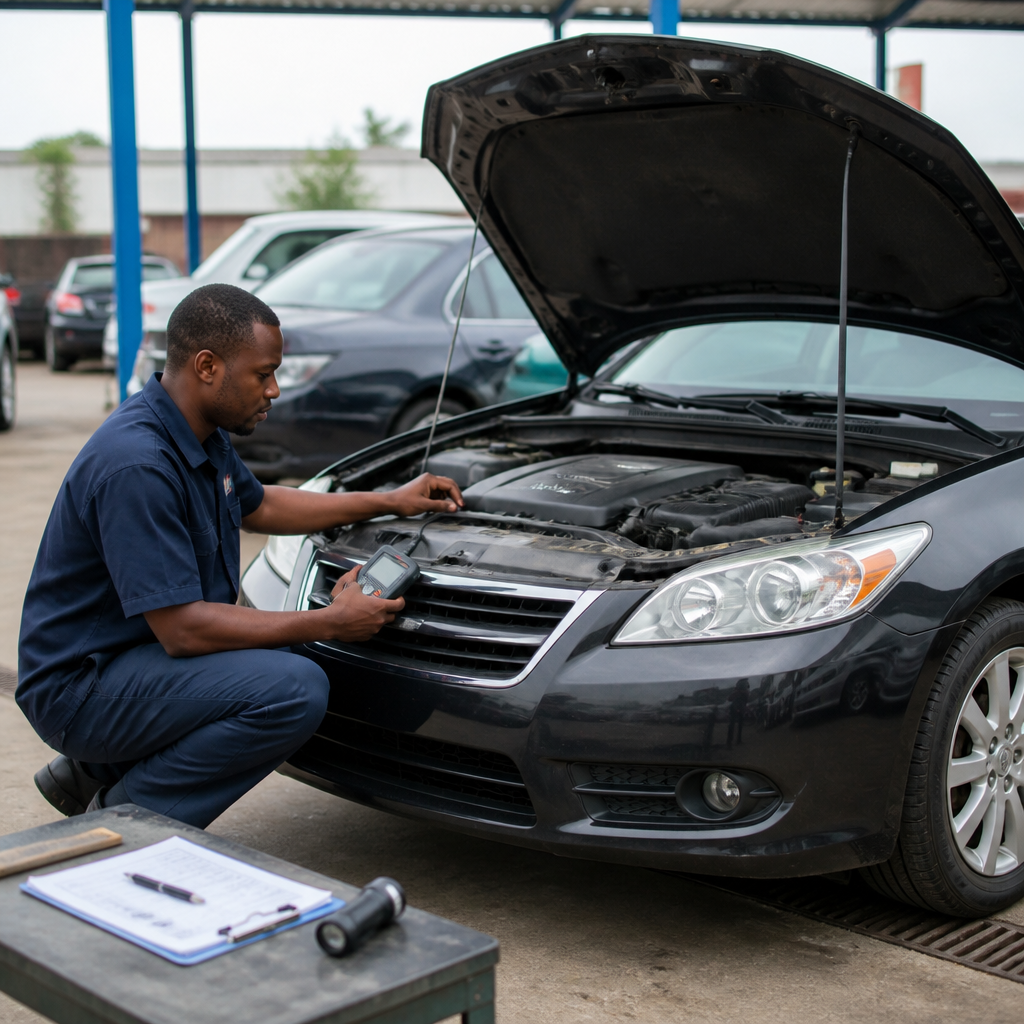
Buying an imported used vehicle can save money, but only when the car is properly examined before payment. This tokunbo car inspection checklist helps you assess the vehicle’s identity, history, body condition, mechanical systems, electronics, tyres and road performance before you commit your money.
A clean appearance does not prove that a car is mechanically sound. Dealers may wash the engine bay, apply polish to worn surfaces or repair visible damage before showing the vehicle. Some faults also appear only when the engine is cold, the car is driven, or the air conditioner runs for several minutes.
For that reason, inspect the car in daylight, take your time and involve an independent mechanic. A seller who refuses a proper inspection, a diagnostic scan or a road test gives you a reason to slow down. The aim is not to find a perfect used car. Instead, you want to understand its condition and avoid expensive surprises. How to Check Tokunbo Car Mileage Before Buying in Nigeria
How to prepare for a tokunbo car inspection
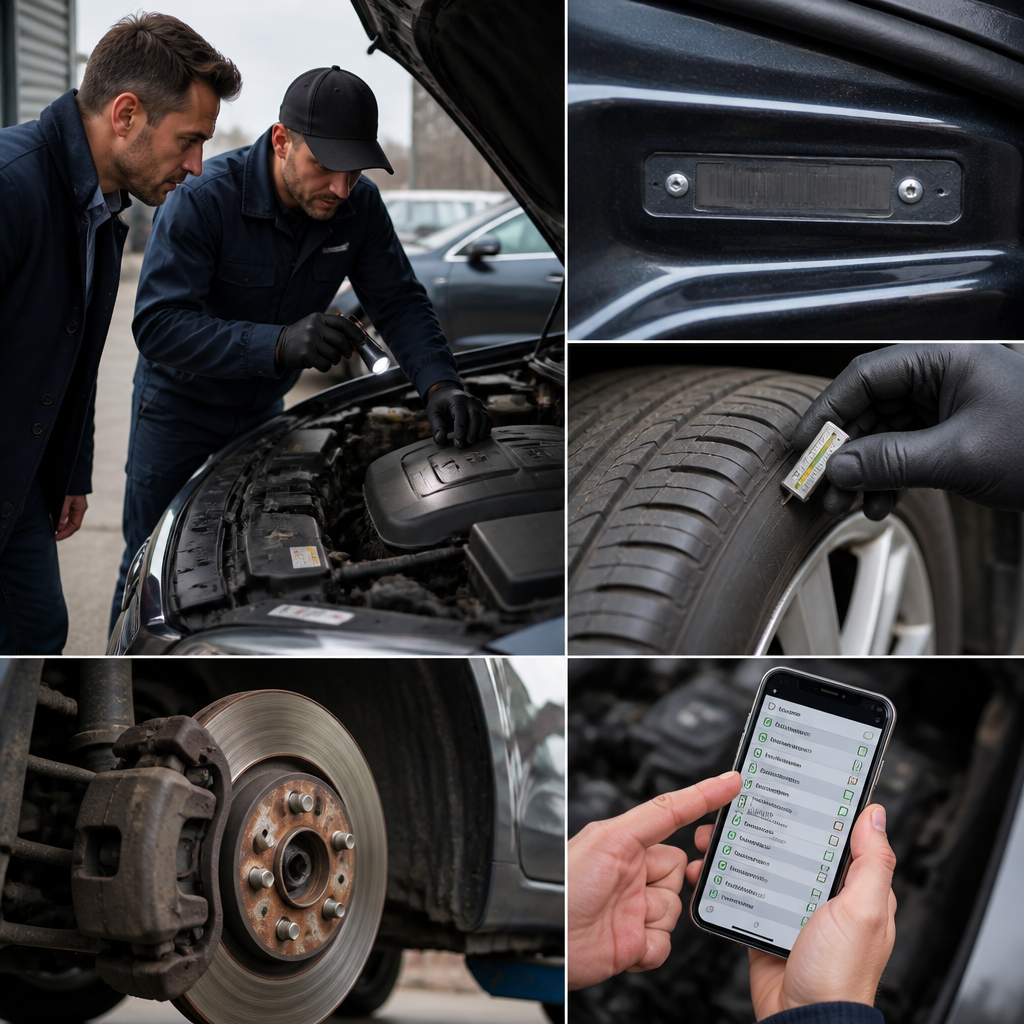
Arrange the inspection before discussing final payment. Ask the seller to leave the vehicle unused for several hours, preferably overnight. A cold start reveals more than a warm engine that has already been started to hide difficult starting, smoke or unusual noise.
Choose a safe location with enough space to walk around the car and drive it. Good daylight helps you identify differences in paint colour, dents and panel gaps. Carry a torch, a clean cloth, a tyre-pressure gauge if available, a small magnet wrapped in fabric, and a phone for photographs. Do not place a magnet on a freshly painted surface without care.
Most importantly, take an independent technician. The seller may know a mechanic who is friendly or convenient, but that person may not be impartial. An independent inspection costs less than repairing a neglected engine, gearbox, suspension system or electrical fault.
Tokunbo car inspection checklist: 20 things to check
1. Confirm the vehicle identification number
Start by matching the vehicle identification number, commonly called the VIN, in several places. Depending on the model, you may find it on the dashboard near the windscreen, the driver’s door frame, the engine bay, the chassis or the vehicle documents. The exact location varies by manufacturer.
Compare every visible VIN with the number on the import and registration paperwork. The characters should be clear and consistent. Be cautious if a plate looks loose, damaged, freshly painted or altered. A mismatch can indicate an administrative problem, incorrect paperwork or a much more serious identity issue.
Write the VIN down and check whether the manufacturer has published recall information for that vehicle. Recall results do not replace a physical inspection, but they can alert you to safety campaigns that may affect the model.
2. Verify the import and ownership documents
Ask to see the documents connected to the vehicle before paying a deposit. Depending on the car’s status, these may include customs evidence, shipping or clearance paperwork, registration documents, proof of ownership and previous service records. The exact documents required can vary according to the vehicle’s history and current registration status.
Check that the name, VIN, engine details and other identifying information agree across the documents. Do not rely on a photograph or a verbal promise that papers will arrive later. If the vehicle is being sold by an agent, confirm that the agent has authority to sell it.
When anything is unclear, ask the relevant government agency or a qualified documentation professional for guidance. A low price does not compensate for a vehicle that cannot be properly transferred or registered.
3. Research the vehicle’s history
Ask the seller where the vehicle came from, how many owners it had, why it was sold and whether it has been involved in a crash, flood or fire. The answers should be consistent with the car’s condition and available paperwork.
Imported used cars may have spent time in different countries. Search for available history records using the VIN, but understand their limits. A history report may not list every accident, repair or ownership event. A clean report is useful evidence, not a guarantee.
Look for clues such as a very low asking price, a recently replaced interior, missing service records or water marks under the seats. If the seller cannot explain an important part of the car’s past, treat that uncertainty as a risk.
4. Examine the exterior panels and paint
Walk around the vehicle slowly. View each panel from several angles and compare its colour, gloss and texture with adjoining panels. Uneven colour, overspray on rubber seals, paint on bolts and rough edges can suggest previous body repairs.
Check the bonnet, roof, boot, doors, bumpers, wings and lower side panels. Look for dents, cracks, rust bubbles, stone chips and poorly repaired scratches. Small cosmetic marks are normal on a used vehicle, but structural damage deserves greater attention.
Use panel gaps as another clue. Doors, bonnet and boot should close securely and sit evenly. Large or irregular gaps may follow collision repairs. However, manufacturing tolerances differ, so compare the left and right sides instead of judging one gap alone.
5. Check for accident damage and structural problems
Open the bonnet and boot. Inspect the inner wings, radiator support, chassis rails and spare-wheel well for creases, fresh welds, unusual sealant, mismatched bolts or new paint. These areas can reveal repairs that are not visible from outside.
Check whether the headlights, taillights and glass carry similar production markings. A replaced lamp or windscreen is not automatically a problem. It becomes more significant when several parts on one side look newer than the rest of the car.
Ask a technician to place the car on a lift if possible. A lift inspection can expose bent components, damaged underbody areas, leaking fluids and poorly repaired structural parts. Never crawl under a vehicle supported only by a jack.
6. Inspect the glass, lights and exterior fittings
Look closely at the windscreen and every window. Chips, cracks and deep scratches can affect visibility and may spread over time. Check that electric windows move smoothly and that each door locks and opens from inside and outside.
Test the headlights, high beams, indicators, hazard lights, brake lights, reversing lights, fog lights and number-plate lights. Ask someone to stand outside while you operate the controls. Condensation inside a lamp can point to a damaged seal, although a brief light mist may have another explanation.
Inspect the mirrors, door handles, wipers, washer jets, antenna, badges and number-plate fittings. These smaller items are easy to overlook, yet replacing several of them can add to the first repair bill.
7. Inspect the tyres and wheels
Check all four tyres and the spare tyre. The tread should wear reasonably evenly across each tyre. Wear on one edge may indicate incorrect alignment, worn suspension or a bent component. Uneven wear can also result from incorrect tyre pressure. How to Identify a Genuine Tokunbo Car in Nigeria
Look for cracks, bulges, puncture repairs and exposed cords. Check the tyre age markings where they are visible, especially if the tread looks deep but the rubber appears hard or cracked. Old tyres may offer poor grip even when they have not travelled far.
Inspect the wheels for bends, cracks and heavy repairs. During the road test, watch for steering vibration or a car that pulls to one side. Confirm that the jack, wheel spanner and locking-wheel-nut key are present if the vehicle uses one.
8. Check the engine bay before starting the car
With the engine cold, look for oil, coolant, fuel or power-steering leaks. Inspect the area beneath the engine and gearbox as well as the visible hoses, belts and fluid reservoirs. A damp surface may be an old spill, but fresh fluid deserves investigation.
Check fluid levels and condition according to the manufacturer’s guidance. Milky oil, oily coolant or unusually low fluid levels can indicate serious problems. Do not open a hot cooling system. The coolant may be under pressure and can cause severe burns.
Look for excessive cleaning. A spotless engine bay is not necessarily bad, but fresh water or degreaser can temporarily hide leaks. Ask the technician to inspect the engine again after the test drive.
9. Listen to the cold start
Ask the seller not to start the engine before you arrive. Observe how quickly it starts and how smoothly it settles into idle. Note any extended cranking, rattling, knocking, squealing or loud ticking.
Some engines make a brief noise at startup, while others should become quiet almost immediately. The correct interpretation depends on the engine design. That is why a technician familiar with the make and model should listen with you.
Watch the exhaust during startup and while the engine warms. Persistent blue smoke can suggest oil consumption. Thick white smoke after the engine is warm may indicate a coolant issue, although condensation can produce temporary vapour. Black smoke may point to excessive fuel or an air-intake problem.
10. Check the engine temperature and cooling system
Allow the engine to reach normal operating temperature. The temperature gauge should rise steadily and remain stable during the inspection. An engine that overheats, takes unusually long to warm up or fluctuates in temperature requires professional diagnosis.
Turn on the air conditioner while the car is stationary. Confirm that the cooling fans operate when required and that the engine does not overheat. Inspect the radiator, expansion tank, hoses and visible connections for leaks or crusty deposits.
Do not assume that a normal temperature gauge proves the cooling system is healthy. Some dashboard gauges remain in the normal zone across a broad temperature range. A technician can use a scan tool or suitable equipment for a more accurate assessment.
11. Test the transmission and clutch
For an automatic vehicle, select each gear with the foot brake applied. Engagement should not involve a harsh delay, loud bang or severe shudder. During the drive, notice whether the transmission changes gear smoothly and responds correctly when you accelerate.
For a manual vehicle, test the clutch in normal traffic and on a gentle incline where it is safe. Excessively high clutch engagement, slipping under acceleration or difficulty selecting gears may signal wear. Listen for noises that change when you press or release the clutch pedal.
Ask the mechanic to check the transmission fluid when the manufacturer’s procedure allows it. Fluid colour alone is not a complete diagnosis, but burnt odour, metal particles or a low level can justify further investigation.
12. Test the brakes
Press the brake pedal while the car is stationary. It should feel firm and should not slowly sink under steady pressure. A soft pedal, excessive travel or warning light needs attention.
During the road test, brake gently and then more firmly in a safe area. The vehicle should stop in a straight line without strong vibration, grinding or pulling. Do not perform an emergency stop on a public road unless conditions make it safe and legal.
Inspect the visible discs and pads through the wheel openings. Heavy scoring, a pronounced lip on the disc or very thin pads may indicate upcoming work. Have a technician inspect the complete braking system, including the rear brakes and parking brake.
13. Examine the suspension and steering
Push down firmly on each corner of the vehicle and observe how it settles. The test is only a rough indication, but repeated bouncing, clunking or a corner that sits lower than the others warrants examination.
Turn the steering wheel while stationary and listen for knocks. On the road, check whether the car tracks straight, returns naturally after a turn and responds without excessive looseness. A steering wheel that sits off-centre may indicate alignment issues or previous suspension work.
Drive over a few safe, gentle road imperfections. Listen for rattles and bangs, but avoid deliberately damaging the vehicle. A mechanic should inspect ball joints, bushes, tie rods, wheel bearings, shocks and springs on a lift.
14. Scan the electronic control systems
A professional diagnostic scan can reveal stored fault codes that are not obvious during a short drive. Ask the technician to scan the engine, transmission, airbag, anti-lock braking and body-control systems where the vehicle supports those checks. How to Check the Used Car Year Before You Buy
Before scanning, confirm that the warning lights illuminate briefly when the ignition is switched on. They should not remain lit after the engine starts. If no warning lights appear at all, ask whether the bulbs or system have been altered.
A scan tool is not a magic certificate. Some problems do not store codes, and a cleared code may return later. Use scan results together with a physical inspection, live data where appropriate and the vehicle’s symptoms.
15. Test the air conditioner and climate controls
Run the air conditioner at different fan speeds and temperature settings. It should produce cool air without unusual smells, excessive noise or a large drop in engine performance. Test the vents, recirculation setting and rear controls if fitted.
Check the heater if the vehicle has one, even in warm weather. Operate the blower on every speed and listen for squealing or rattling. A weak fan, damaged control panel or leaking cooling system can become costly to repair.
Inspect the cabin for damp carpets, moisture under the dashboard and water marks around the roof, doors and boot. These signs may result from blocked drains, damaged seals or earlier flood exposure.
16. Test every electrical feature
Work through the controls systematically. Test the horn, central locking, alarm, remote key, interior lights, instrument illumination, power seats, heated seats, sunroof, boot release, USB ports and cigarette-lighter socket if fitted.
Operate the infotainment system, radio, speakers, navigation, reverse camera and parking sensors. Check that the screen starts properly and that the system does not restart or freeze. Confirm that the steering-wheel controls work.
Inspect the battery terminals for corrosion and ask about the battery’s age. A weak battery can create confusing electrical symptoms. However, replacing the battery may not solve an underlying charging or wiring problem, so test the alternator and electrical system when necessary.
17. Inspect the interior, seats and safety equipment
Compare the interior wear with the claimed mileage. A high-mileage vehicle can still be good, and a low-mileage vehicle can be abused. Treat a large mismatch between the odometer and the condition of the pedals, steering wheel, driver’s seat and door handles as a reason to ask questions.
Check every seat adjustment and seat belt. Pull each belt out, inspect it for damage and confirm that it locks when pulled sharply. Test the seat-belt warning system where practical. Look for airbag warning lights and signs of removed or replaced trim around the airbags.
Smell the cabin carefully. Strong fragrance can sometimes mask dampness, smoke or mould. Lift floor mats and inspect the carpet, seat rails, boot lining and spare-wheel well for moisture, rust or silt-like residue.
18. Confirm the odometer and service history
Record the displayed mileage and compare it with service invoices, inspection records, import documents and maintenance stickers. The mileage should generally progress in a believable way. Gaps do not automatically prove fraud, but they deserve an explanation.
Ask which major maintenance jobs have been completed. Depending on the model, this may include timing-belt replacement, transmission service, coolant replacement, brake work or suspension repairs. Do not assume that a seller’s statement means the work was completed.
Call the workshop listed on an invoice only through contact details you verify independently. A document can look official and still be unreliable. When records are missing, budget for preventive maintenance rather than treating the absence as proof that the car needs nothing.
19. Complete a proper road test
A short drive around the dealer’s compound is not enough. Drive through slow traffic, a clear stretch of road and a safe incline if possible. Keep the route legal and safe, and confirm that you are insured and authorised to drive the car.
During the drive, assess starting, acceleration, gear changes, steering, braking, suspension, air conditioning and engine temperature. Turn off the radio so you can hear mechanical noises. Notice vibrations through the steering wheel, seat or pedals.
Try reversing, parking and making tight turns. Listen for clicking from the drive shafts, grinding from the brakes and humming from wheel bearings. After the test, park on a clean surface and inspect underneath for fresh leaks. A second look at the engine bay while it is hot can reveal seepage that was not visible earlier.
20. Calculate the repair cost and negotiate carefully
Write down every issue, even minor ones. Divide the findings into three groups: safety-critical repairs, mechanical or electrical repairs, and cosmetic work. Get realistic estimates from a workshop that knows the vehicle. Include tyres, fluids, filters, belts, registration-related costs and towing if applicable.
Do not accept a vague promise that defects will be repaired after payment. If the seller agrees to fix something, put the agreement in writing and inspect the completed work before releasing the balance. Confirm which exact parts or repairs are included. How to Detect Engine Problems During a Test Drive
Use the inspection results to make a rational decision. A car with several manageable faults may still be suitable at a fair price. A vehicle with uncertain identity, flood damage, serious structural damage or a failing engine may not be worth the risk, regardless of the discount.
Red flags that should make you pause
Some warning signs are more serious than a worn tyre or faded bumper. Pause the transaction and seek professional advice when you notice any of the following:
- The VIN does not match across the car and documents.
- The seller refuses an independent mechanic, diagnostic scan or road test.
- The engine is already warm without a clear reason when you arrive.
- There are signs of flood exposure, such as dampness, silt, corrosion or persistent electrical faults.
- The car has major differences in paint, panel alignment or chassis construction.
- The seller pressures you to transfer money immediately.
- Important documents are missing, inconsistent or promised only after payment.
- The odometer reading does not fit the service history or interior wear.
- Warning lights have been covered, removed or fail to illuminate during the ignition check.
- The vehicle overheats, smokes heavily, slips between gears or makes deep knocking noises.
One small defect does not necessarily make a car a bad purchase. Several unrelated warning signs, however, can indicate poor maintenance or an attempt to hide a larger problem. Walk away when the risks cannot be verified.
How to handle payment after the inspection
Only discuss final payment after you have checked the car, documents and seller’s authority. Confirm the agreed price, what is included, the delivery date and the documents you will receive. Keep a written record of the vehicle’s VIN and the transaction details.
Use a traceable payment method and retain receipts. Avoid sending money to a third party unless you have verified that person’s role and authority. Do not hand over the entire balance because the seller says another buyer is waiting.
Before completing the transaction, inspect the vehicle again. Confirm that the VIN is unchanged, the agreed accessories are present and no new damage has occurred. Collect all keys, service records and documents that form part of the agreement.
When should you reject the vehicle?
Rejecting a car can be difficult when you have already spent time negotiating. Still, the purpose of a tokunbo car inspection is to protect your decision, not to justify a purchase you already want.
Reject the vehicle or delay payment when its identity cannot be confirmed, the paperwork is materially inconsistent, the seller blocks a reasonable inspection, or the repair cost is beyond your budget. Also be cautious with severe flood damage, major structural repairs and signs of a failing engine or transmission.
If the problem is repairable, ask for a written repair agreement or negotiate a price that reflects a verified estimate. Never base the decision on the seller’s assurance that a fault is “minor” without having a technician assess it.
Frequently asked questions
Can I inspect a tokunbo car without a mechanic?
You can perform a basic visual check yourself, but a mechanic adds important expertise. A technician can inspect the underbody, scan electronic systems, assess fluid leaks and identify accident or suspension damage. If you cannot bring a mechanic, arrange an independent inspection before paying a non-refundable deposit.
How long should a vehicle inspection take?
There is no universal duration. A basic inspection may be relatively quick, while a thorough check with a lift, diagnostic scan and road test takes longer. Do not allow a seller’s schedule to shorten checks that could reveal expensive faults.
Is a clean engine bay a good sign?
Not always. Cleaning may be normal detailing, but it can also hide leaks temporarily. Inspect the engine when cold, look underneath, check fluid levels and examine it again after the road test.
Should I trust a vehicle history report?
Use a history report as one source of evidence. It may reveal recorded accidents, mileage events or ownership information, but records can be incomplete. Match the report with the VIN, documents, physical condition and an independent inspection.
What if the seller offers a warranty?
Read the warranty before relying on it. Confirm the duration, covered components, exclusions, repair location, claim process and who pays for diagnosis or labour. A warranty does not remove the need to inspect the vehicle before payment.
Should I pay for a diagnostic scan?
In many cases, yes. A scan can identify stored or active faults in systems such as the engine, transmission, airbags and anti-lock brakes. It cannot detect every mechanical problem, so combine it with a physical inspection and road test.
Final checklist before you pay
Before transferring the balance, confirm that you have completed these final steps:
- Matched the VIN on the vehicle and all available documents.
- Reviewed ownership, import and registration information.
- Inspected the body, chassis, glass, lights and tyres.
- Started the engine cold and checked for smoke, leaks and unusual noise.
- Tested the gearbox, clutch, brakes, steering and suspension.
- Scanned the main electronic control systems.
- Tested the air conditioner and electrical features.
- Checked the interior, seat belts, airbags and signs of water damage.
- Completed a safe road test.
- Received written terms and retained proof of payment.
A careful inspection may uncover a few normal used-car defects. That is not a failure. It gives you the information needed to negotiate fairly, plan maintenance and decide whether the vehicle suits your budget.
Take your time, use an independent technician and never let urgency replace evidence. The best tokunbo car inspection is the one completed before payment, when you still have the power to negotiate or walk away.
4 thoughts on “Tokunbo Car Inspection: 20 Things to Check Before Payment”