Checking for a used car oil leak can save you from buying a vehicle that needs expensive repairs. Before you agree to a price, look underneath the car, inspect the engine bay, check the oil level, and ask for a proper mechanical inspection. A few dark marks may be harmless residue, but fresh oil, a falling oil level, or smoke from the engine deserves careful attention.
Oil leaks are common in older vehicles, yet they are not all equally serious. A small seep from a gasket may need monitoring or a relatively simple repair. Oil leaking onto a hot exhaust component can create smoke, unpleasant smells, and a potential fire risk. A severe leak can also reduce lubrication and cause major engine damage if the vehicle is driven without enough oil.
This guide explains how to find the source, how to judge the seriousness, what questions to ask the seller, and when to walk away. It is useful whether you are inspecting a locally used vehicle, an imported car, or a car advertised by a private seller or dealer. Used Car Nigeria: When Is the Best Time to Buy?
Why a used car oil leak matters
Engine oil forms a protective film between moving metal parts. It also helps control heat and carries contaminants toward the oil filter. If oil escapes faster than the owner replaces it, the engine may run with insufficient lubrication. That can lead to accelerated wear, overheating, knocking noises, or complete engine failure.
However, the presence of oil does not automatically mean the engine is ruined. Engines often collect a thin coating around seals and covers as they age. The important questions are whether the oil is fresh, how quickly it returns, where it is coming from, and whether the leak affects safe operation.
A seller may describe a leak as “just a gasket” or “normal for the age.” Sometimes that assessment is reasonable. Still, you cannot identify the repair cost from the description alone. Access to the leaking component, labour time, replacement parts, and any damage caused by low oil can all change the final bill.
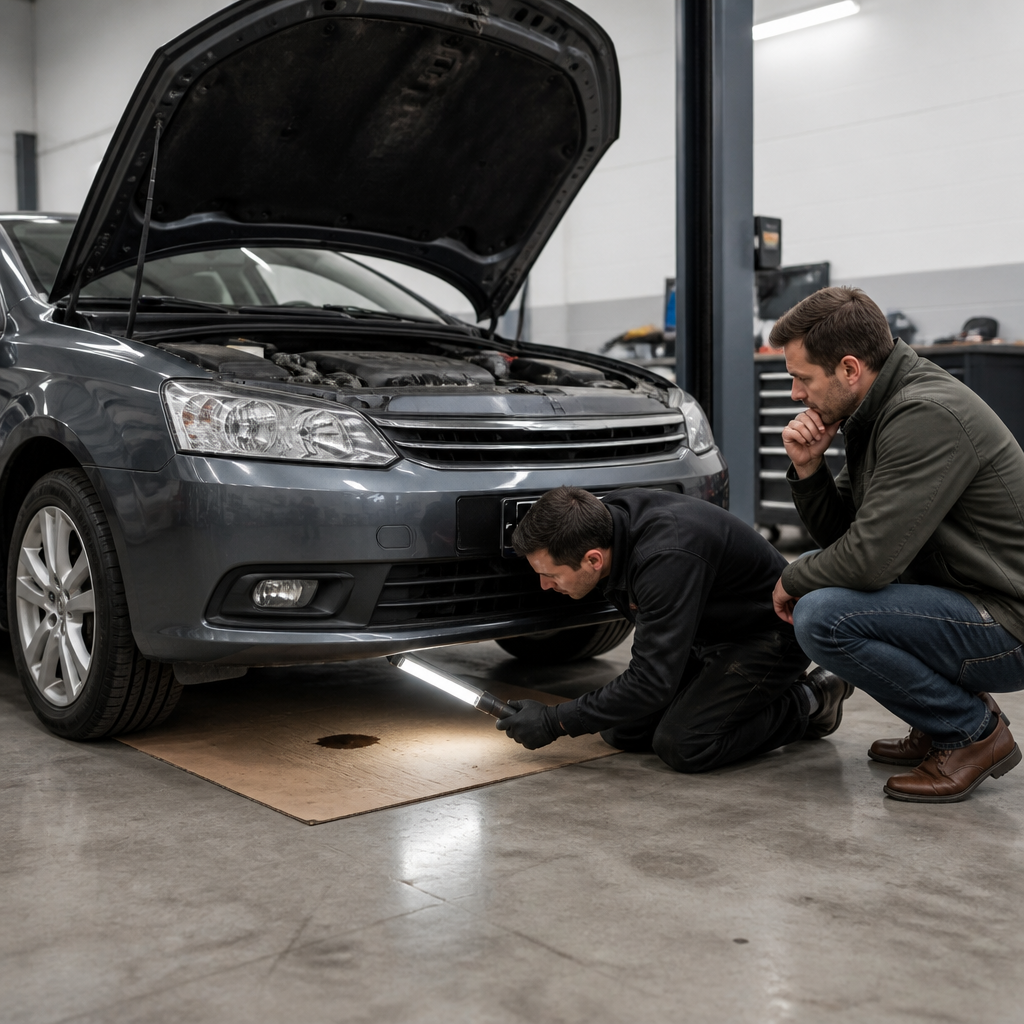
Also remember that oil on the ground may not have come from the car you are viewing. A previous vehicle could have left the mark. That is why you should inspect the car’s underside, use fresh cardboard if possible, and compare the position of any drip with the engine and transmission above it.
What engine oil usually looks and smells like
Fresh or relatively clean engine oil is usually amber or brown, although its colour changes as it circulates. Used oil can become dark brown or nearly black. Colour alone does not prove that a leak exists. A recently serviced engine may have clean oil, while an older engine may have dark oil without leaking.
Engine oil feels slippery and leaves a smooth, greasy film. It is different from water, coolant, brake fluid, power-steering fluid, and fuel. These fluids can appear in similar areas, especially after they spread across a dirty engine or undertray.
- Engine oil: usually brown to black, thick or slippery, with an oily smell.
- Coolant: often coloured, though some coolant is nearly clear; it may feel watery and have a sweet smell. Do not taste any vehicle fluid.
- Brake fluid: commonly clear to amber and less thick than engine oil. It can damage painted surfaces.
- Automatic transmission fluid: may be red, pink, brown, or dark, depending on its age and formulation.
- Power-steering fluid: may resemble transmission fluid and can leak near the front of the vehicle.
- Fuel: is thin, evaporates quickly, and has a strong petrol or diesel smell. Treat a fuel leak as urgent.
If you are unsure, place a clean piece of light-coloured cardboard under the suspected area. Do not rely on colour alone. A mechanic can identify fluids more accurately and trace them to their source.
How to check a used car oil leak before starting the engine
Begin with the vehicle parked on level ground. A flat surface makes the oil level easier to check and helps you interpret any marks below the car. Ask the seller not to clean or start the engine before you arrive if practical. A freshly washed engine can hide evidence, while a warm engine can temporarily thin the oil and change the way it appears.
Look at the ground underneath
Use a torch in daylight or a bright inspection light in a shaded area. Look beneath the front of the vehicle, around the centre, and near the rear of the engine. Focus on the area behind the front bumper and between the front wheels, because many engine and transmission leaks collect there.
Fresh drops are more concerning than an old, dry stain. Wet oil may reflect light and feel slippery. A damp area on the lower engine or a steady drip after the vehicle has been parked suggests an active leak. A wide, dark patch may indicate that oil has been leaking for some time, although the patch could also belong to another vehicle.
Do not crawl under a vehicle supported only by a jack. If you need to inspect the underside closely, use a qualified workshop with proper lifting equipment. Never place any part of your body under a car unless it is securely supported by equipment designed for that purpose.
Inspect the lower engine and undertray
Many modern cars have a plastic or fabric undertray beneath the engine. It protects components from dirt and water, but it can also collect fluid. Oil may travel along the tray before dripping from a point that is not directly below the original leak.
Look for fresh wetness, oily dust, streaks, and areas where dirt has formed a sticky paste. A clean, dry engine is not proof that there is no leak. Some sellers clean the engine before showing the car, and some leaks only appear after the oil becomes hot or the engine builds pressure.
Check whether bolts, drain plugs, and the oil filter area look unusually wet. A loose drain plug, damaged sealing washer, or poorly fitted filter can leak after servicing. Those faults may be easier to fix than a rear main seal or a leak from behind the timing cover, but you still need a professional assessment.
How to inspect the engine bay
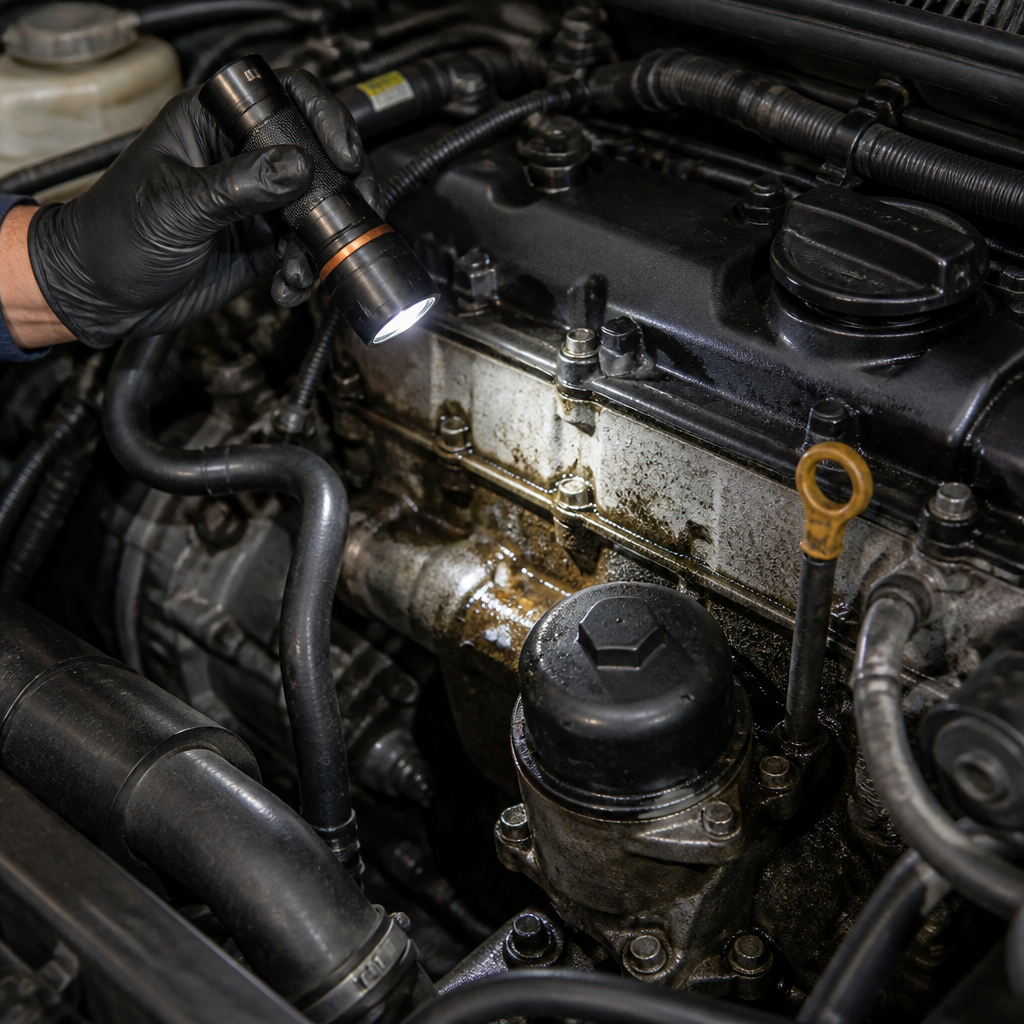
Open the bonnet and use a torch to examine the top and sides of the engine. A clean engine bay is not automatically better. Look for evidence of cleaning, such as water around electrical connectors or a uniformly wet appearance. More useful clues include oil gathered in corners, fresh trails below a gasket, and grime stuck to a damp surface.
Common areas to inspect include the valve cover, oil filler cap, front cover, timing cover, oil filter housing, dipstick tube, and the area around the crankshaft pulley. The exact layout varies by engine. You do not need to identify every component to spot a problem. Instead, find the highest point where the oil appears and follow the trail downward.
Oil usually moves down and backward because of gravity, airflow, and engine movement. The lowest wet point is not always the source. For example, oil from a valve cover can run down the side of the cylinder head and collect near the transmission. A mechanic may need to clean the area and use a dye or inspection lamp to trace a difficult leak.
Check the oil filler cap and the area around it. A loose cap can allow oil mist to escape. A damaged cap seal can also create a mess. Remove the cap only when the engine is switched off and safe to touch. A small amount of light-coloured residue under the cap can occur in some conditions, but thick creamy sludge may indicate moisture contamination or another engine problem. That sign needs professional evaluation rather than a quick conclusion.
Check the dipstick and oil level
The dipstick provides useful information, but it does not prove whether a leak exists. Park on level ground, switch off the engine, and follow the vehicle maker’s instructions. In many cars, the correct process involves waiting several minutes so oil can drain back into the sump. Remove the dipstick, wipe it clean, insert it fully, then remove it again and read the level. How to Check a Used Car Engine Condition Before Purchase
The oil should sit between the marked minimum and maximum areas. If it is below the minimum, ask why. The seller may have neglected servicing, checked it incorrectly, or lost oil through a leak. A level that is far below the safe range is a serious warning, especially if the engine has been driven that way.
Do not assume that adding oil solves the problem. A low level may hide an active leak or excessive oil consumption. Ask to see service invoices and oil-change records. Compare the current mileage with the dates and mileage shown in those records. Missing maintenance evidence does not prove abuse, but it increases uncertainty and should affect your buying decision.
Some vehicles do not have a traditional dipstick. They use an electronic oil-level display, which may require the engine to be warm and the car to be parked in a specific way. Follow the owner’s manual or ask a qualified technician to perform the check. Avoid guessing from an electronic reading taken under the wrong conditions.
Start the engine and watch for warning signs
Ask the seller to start the engine while you observe the vehicle. Before starting, check that the oil-pressure warning light appears briefly as part of the dashboard self-test. After the engine starts, it should normally go out. If the oil-pressure light remains on, flickers, or appears while the engine is idling, switch off the engine and treat the issue as urgent.
A warning light does not identify the exact cause. It could relate to low oil pressure, a sensor, wiring, a blocked pickup, a failing oil pump, or severe internal wear. Either way, do not continue a test drive until the problem has been diagnosed.
Watch the ground and engine bay while the engine idles. Some leaks only appear once oil circulates under pressure. Ask the seller to turn the steering wheel only if needed for another inspection, and keep hands, clothing, and tools away from belts, pulleys, fans, and hot components.
Listen for unusual ticking, tapping, rattling, or knocking. These noises can have many causes, and they do not prove an oil leak. However, unusual engine noise combined with a low oil level or an oil-pressure warning is a strong reason to stop the inspection.
Look for smoke and smell
Blue or blue-grey smoke from the exhaust can suggest that the engine is burning oil internally. That is different from an external leak. Worn piston rings, valve seals, a turbocharger problem, or other faults can allow oil into the combustion process. A short puff after starting may have a different cause from continuous smoke under acceleration.
Smoke rising from the engine bay often points to oil dripping onto a hot exhaust manifold, catalytic converter, or other hot surface. You may also smell burning oil. This condition should not be dismissed as a minor cosmetic issue. It can worsen, damage nearby components, and create a fire hazard.
White vapour from the exhaust can be normal condensation when the engine is cold. Thick, persistent white smoke may indicate coolant entering the combustion chamber. Black smoke can point to excessive fuel. These symptoms need separate diagnosis, but they are important because a leak inspection should consider the whole engine, not only the ground beneath it.
Common sources of engine oil leaks
Several components can cause a used car oil leak. The same symptom may come from a different part on different engines, so use this list as a guide rather than a diagnosis.
- Valve cover gasket: This gasket seals the top of the engine. Oil may appear around the cover, run down the side of the engine, or reach hot components.
- Oil pan gasket or sealant: The oil pan sits beneath the engine and can leak around its edge. Impact damage may also distort the pan.
- Drain plug or sealing washer: A damaged washer, loose plug, or cross-threaded sump can leak after an oil change.
- Oil filter or filter housing: A double gasket, loose filter, damaged housing, or incorrect installation can cause fresh oil to escape.
- Front crankshaft seal: Oil may collect near the crank pulley and spread across the front of the engine.
- Rear main seal: This seal sits between the engine and transmission. Repair can require substantial labour because of its location.
- Timing cover: A leak from the front cover may be difficult to distinguish from a nearby seal or gasket.
- Turbocharger oil lines: Turbocharged engines have oil supply and return lines that can leak if seals, pipes, or connections deteriorate.
- Crankcase ventilation system: Blocked or faulty ventilation can increase internal pressure and push oil past seals.
- Oil cooler or filter housing seals: These components may be mounted on the side of the engine and can spread oil widely.
Repair difficulty depends on the exact vehicle and engine. A gasket that looks inexpensive may require removal of other components. Conversely, a dirty area may only need cleaning and a correctly tightened fastener. Get a written diagnosis before using the suspected repair as a negotiating figure.
Distinguish an external leak from oil consumption
Some engines lose oil without leaving a visible puddle. The engine may burn oil internally, or oil may leak only while the vehicle is moving. If the dipstick level drops between checks but the ground stays dry, ask a mechanic to investigate both possibilities.
Blue exhaust smoke, oily deposits inside the intake system, and a strong oil smell can support a diagnosis of oil consumption. Still, only proper testing can separate worn rings, valve seals, turbocharger problems, and other causes.
Ask whether the seller regularly adds oil between services. A statement such as “it uses a little oil” needs clarification. Ask how much oil is added, how often, under what driving conditions, and whether a workshop has measured the cause. Vague answers should make you more cautious.
Oil consumption and external leakage can occur together. A vehicle may have a small gasket leak and also burn oil through a worn engine. That combination can become expensive, so a pre-purchase inspection is especially important.
Take a proper test drive
Drive the car only after the basic checks are satisfactory. During the test drive, vary the speed and include gentle acceleration, steady cruising, and normal braking where safe. Pay attention to warning lights, engine noises, smells, and changes in performance. How to Detect Engine Problems During a Test Drive
After the drive, park on a clean surface and inspect the ground again. Look under the engine while it is warm, but do not touch hot parts. A leak that was not visible when cold may appear after the engine reaches operating temperature.
Check the oil level again only according to the manufacturer’s procedure. A small change is not automatically meaningful, especially after a short drive. However, a noticeable loss, fresh dripping, or new smoke requires professional investigation.
If you smell burning oil after the drive, ask the seller to explain it. Do not accept an unsupported statement that the smell is “normal.” Some vehicles do have minor seepage, but the source and risk still need confirmation.
Questions to ask the seller
Good questions help you separate a known, documented repair from an unexplained problem. Ask calmly and record the answers where permitted.
- Has the engine ever leaked oil?
- When was the last oil and filter change?
- What oil grade and specification were used?
- Has the oil-pressure warning light ever appeared?
- Does the engine need oil added between services?
- Has any gasket, seal, oil pan, filter housing, or turbo oil line been replaced?
- Was the underside or engine bay recently cleaned?
- Can you see service invoices or inspection reports?
- May I have an independent mechanic inspect the vehicle before payment?
A seller who provides consistent records is easier to evaluate than one who relies only on verbal assurances. A dealer or private seller may not know every repair detail, but they should allow reasonable checks. Pressure to pay a deposit before inspection is a warning sign.
When a leak is a negotiation point and when to walk away
A minor seep may not justify abandoning an otherwise well-maintained car. For example, a dry stain around an ageing gasket, with a stable oil level and no smoke, may be manageable. Even then, obtain a mechanic’s opinion and estimate the repair before making an offer.
Consider walking away, or pause the purchase until repairs are verified, when you find any of these signs:
- The oil-pressure warning light remains on or returns during the test drive.
- The engine is significantly below the minimum oil mark.
- Fresh oil is dripping steadily while the engine runs.
- Smoke or a strong burning-oil smell comes from the engine bay.
- The engine makes knocking, severe tapping, or grinding noises.
- The seller refuses an independent inspection.
- The underside is heavily coated in fresh oil and the source cannot be identified.
- The vehicle has both visible leakage and unexplained oil consumption.
- There is evidence of low-oil operation, overheating, or major engine work without records.
- The seller has cleaned the engine immediately before viewing and cannot explain why.
Do not negotiate only against the price of a gasket. Include diagnosis, labour, replacement fluids, related seals, possible damaged components, and the cost of transport if the car cannot be driven. If the source is uncertain, the safest assumption is that the repair estimate may change after disassembly.
For a vehicle with an active leak, make any purchase conditional on a written repair invoice and a follow-up inspection. Confirm that the repair addresses the source rather than merely cleaning the visible oil. A clean engine can become dirty again if the underlying fault remains.
Use an independent pre-purchase inspection
A pre-purchase inspection is one of the most useful steps when buying a used car. Choose a mechanic who is independent of the seller. Tell the mechanic that you are concerned about a used car oil leak, but ask for a complete inspection rather than a narrow visual check.
A proper inspection may include checking fluid levels, lifting the vehicle safely, examining the engine and transmission, scanning for fault codes, checking for smoke, and reviewing signs of previous repairs. The mechanic may also recommend an oil-pressure test, compression test, leak-down test, or cleaning followed by a dye test. Not every test is necessary for every car.
Ask for the findings in writing. The report should distinguish between a light seep, active dripping, and a major leak. It should also identify urgent safety issues and repairs that can reasonably wait. This information gives you a better basis for deciding whether to buy, negotiate, or leave.
An inspection cannot predict every future fault. It is a snapshot of the vehicle’s condition on that day. Nevertheless, it can reveal problems that are difficult for an untrained buyer to see and may prevent a costly mistake.
Safe inspection habits
Vehicle inspection involves moving parts, hot surfaces, chemicals, and unstable lifting equipment. Protect yourself while checking the car.
- Park on level ground and apply the parking brake.
- Keep hands, loose clothing, hair, and tools away from belts and fans.
- Do not open a hot cooling system or touch hot exhaust parts.
- Do not smoke near fuel, oil, or engine vapour.
- Wear gloves when handling dirty components, but do not use them as a reason to touch hot parts.
- Use cardboard rather than your hands to check for fresh drips.
- Never work beneath a vehicle held only by a jack.
- Clean oil spills promptly and dispose of used oil through an appropriate collection service.
If fuel is leaking, stop the inspection and move away from ignition sources. If oil is spraying, the oil-pressure light is on, or the engine is overheating, do not drive the vehicle to another location. Arrange professional recovery or inspection.
How maintenance records help
Service records can show whether the vehicle has received regular oil changes and whether a leak was previously repaired. Look for dates, mileage, parts replaced, oil specifications, and workshop details. A single invoice is useful, but a consistent history is more informative. How to Identify a Genuine Tokunbo Car in Nigeria
Compare the records with the vehicle’s current condition. If an invoice says a major leak was repaired recently but the same area is wet again, ask whether the repair failed or whether the leak comes from a different component. If the mileage appears inconsistent, investigate before relying on the service history.
Some owners perform basic maintenance themselves. That does not automatically mean the car is poor quality. However, you should ask what was done and keep in mind that home servicing may leave less formal evidence. A professional inspection becomes more valuable when the history is incomplete.
After buying: monitor the car carefully
If you buy a vehicle with only minor seepage, monitor it rather than ignoring it. Place clean cardboard beneath the engine overnight during the first few weeks. Check the oil level at regular intervals using the correct procedure, and record the mileage and amount added.
Look for changes in smell, smoke, warning lights, and the size of any spots. A leak that remains stable may be suitable for scheduled repair. A leak that becomes wet, spreads, or lowers the oil level needs prompt attention.
Use the oil grade and specification recommended for the vehicle. The wrong oil may affect lubrication, seals, emissions equipment, or turbocharger operation. Do not use thicker oil simply to hide a leak unless a qualified mechanic recommends it for that engine.
Keep oil at the correct level. Overfilling is also harmful and can cause foaming, pressure problems, or damage to seals and emissions components. If you are unsure how to check or top up the oil, ask a workshop to show you.
Frequently asked questions
Can a used car have a small oil leak and still be worth buying?
Yes, it can. A minor seep does not automatically make a vehicle a bad purchase. The decision depends on the source, rate of leakage, repair cost, service history, engine condition, and asking price. Have an independent mechanic confirm that the leak is minor and include the likely repair in your budget.
Does a clean engine mean there is no leak?
No. The engine may have been cleaned, or the leak may only appear when the engine is hot or running. Look for fresh trails, dampness, oil collected in corners, and evidence that the engine bay was recently washed. A follow-up inspection after a test drive is more useful than a quick look at a clean engine.
How long can I drive with an oil leak?
There is no safe distance that applies to every leak. A small seep may remain stable for a while, while a damaged filter or pressurised line can lose oil quickly. If the oil-pressure warning light appears, the engine is noisy, or oil is dripping heavily, switch off the engine and arrange professional help.
Can an oil leak cause a car to fail an inspection?
Inspection rules vary by location and by the type and severity of the leak. Some inspections distinguish between slight seepage and active leakage. Check the requirements that apply where the vehicle will be registered, but do not treat a car as safe merely because it passed a previous inspection.
Is black oil a sign that the engine is damaged?
Not necessarily. Engine oil darkens as it collects combustion by-products and contaminants. Black oil may indicate that a service is due, but it does not by itself prove internal damage or a leak. Combine the oil’s condition with its level, smell, maintenance records, warning lights, and the engine’s behaviour.
Can an oil leak be repaired without replacing the engine?
Many external leaks can be repaired without replacing the engine. The repair may involve a gasket, seal, filter housing, oil pan, hose, or fastener. However, if the engine has suffered severe damage from low oil pressure or prolonged oil starvation, the required repair may be much larger. Testing is necessary before reaching a conclusion.
Should I trust a seller who says the leak is harmless?
Trust evidence rather than a description. Ask for service records, inspect the vehicle cold and warm, and obtain an independent diagnosis. A seller may be correct about a minor seep, but you should be comfortable making the decision based on documented condition rather than reassurance alone.
Final checklist for buyers
Before committing to a used vehicle, work through this short checklist:
- View the car on level ground and inspect beneath it.
- Check the engine bay for fresh oil, oily dirt, and recent cleaning.
- Confirm the oil level using the correct procedure.
- Start the engine and watch the oil-pressure warning light.
- Listen for unusual engine noises and watch for smoke.
- Take a normal test drive, then inspect for fresh drips or smells.
- Ask specific questions about oil use, repairs, and service history.
- Arrange an independent inspection before paying in full.
- Obtain a written repair estimate if any leak is found.
- Walk away if the seller refuses reasonable checks or the engine shows urgent warning signs.
The best approach to a used car oil leak is careful observation followed by professional confirmation. Do not panic over a dry stain, but do not dismiss fresh oil, low oil level, smoke, or an oil-pressure warning. A few minutes of checking can reveal a maintenance issue, support a fair negotiation, or prevent you from buying a vehicle with a serious hidden problem.